Food Photography: Where Hungry Lens Meets
Food photography has become a big hit worldwide. With the rise of social media, especially Instagram, food pictures have become very popular. Whether you’re a food blogger a professional photographer or someone who loves taking food photos learning food photography is key. This guide will cover beginner tips the importance of natural light, the best cameras and lenses, composition and using main light for food blog photography. Let’s explore the world of food photography and learn to make your food images look as good as they taste!
1. Food Photography Tips for Beginners
If you’re new to food photography, here are some essential tips. First understand your subject food. You want it to look so good it makes you hungry. This means paying attention to detail being creative and knowing a bit of tech.
- Know Your Camera and Settings: Before you start taking food photos, get to know your camera’s settings. Whether it’s a DSLR, mirrorless or smartphone knowing how to adjust aperture, shutter speed and ISO is key. This helps you get sharp well-lit photos.
- Use Natural Light:: Natural light is your best ally in food photography. It makes food colors and textures look better. Place your food near a window and use a reflector or whiteboard to bounce light back reducing shadows and creating soft light.
- Invest in Good Photography Equipment: You don’t have to spend a lot, but some basic equipment can improve your photos. A tripod helps with sharp shots and a reflector or diffuser can control natural light.
- Experiment with Angles and Perspectives: Try different angles and perspectives. Overhead shots are great for flat lays, while a 45-degree angle shows off a dish’s depth. Be creative to find the best angle for your food photography.
- Focus on Composition: Good composition is crucial in food photography. Use the rule of thirds for balance and play with negative space to highlight the food. Think about the colors of your food and props to make it stand out.
Your lens is your voice. Learn to make it heard at RVR School of Photography By Simran
2. Shoot with Natural Light
Natural light is key for great food photography photos. It’s softer and more flattering than artificial lights. Here are some tips for using natural light:
- Find the Right Spot: Place your food near a window for indirect sunlight. Direct sunlight can be too harsh. Indirect light is perfect for food photography.
- Use Reflectors: Reflectors help fill in shadows and balance the light. A whiteboard or aluminum foil works well. Place it opposite the light to bounce light onto the food photos removing harsh shadows.
- Avoid Overhead Lights: Overhead lights can create unflattering shadows and color casts. Always use natural light for the best results.
- Time of Day Matters: The time of day can greatly impact your photos. Early morning and late afternoon provide the softest light, known as the “golden hour.” Midday light however, can be too harsh. Plan your shoots accordingly to take advantage of the best natural light .
- Adjust White Balance: If you’re shooting indoors with natural light, the color temperature can vary depending on the time of day and weather. Adjust your camera’s white balance to ensure that the colors in your food are true to life
3. Cameras and Lenses for Food Photography
Choosing the right camera and lenses is crucial for achieving professional-quality food photos. While you can take decent food pictures with a smartphone investing in a good camera and lens can elevate your photography to the next level.
- Choosing the Right Lens: The lens you choose can significantly impact the look of your photos. A 50mm prime lens often referred to as the “nifty fifty” is a favorite among food photographers due to its versatility and sharpness. It provides a natural perspective and allows for a shallow depth of field, making the subject pop against a blurred background. For more detailed shots, a macro lens (such as a 100mm) can capture intricate details with stunning clarity.
- Consider Your Budget: While high-end cameras and lenses offer superior quality, there are also more affordable options that can deliver great results. Entry-level DSLRs and mirrorless cameras, such as the Canon EOS Rebel series or Sony Alpha A6000, paired with a 50mm lens, can produce excellent food photos without breaking the bank.
- Essential Accessories: Besides the camera and lens having the right accessories can improve your food photography. A sturdy tripod is essential for keeping your camera stable, especially in low-light situations. Additionally having a variety of props and backgrounds can help you create different moods and styles in your photos.
- Use Manual Modessential: To have full control over your camera’s settings, shoot in manual mode. This allows you to adjust the aperture, shutter speed and ISO independently, giving you greater flexibility to achieve the desired exposure and depth of field.
4. Food Photography Composition Techniques to Improve Your Photos
Food photography Composition is an art form in itself and is one of the most important aspects of food photography. A well-composed photograph not only draws the viewer’s attention but also tells a story.
- Rule of Thirds: The rule of thirds is a fundamental principle of composition that involves dividing your frame into a 3×3 grid. Place the main elements of your photo along these lines or at their intersections to create a more balanced and engaging image. This technique helps to draw the viewer’s eye naturally to the subject .
- Use Leading Lines: Leading lines are lines within a photo that lead the viewer’s eye to the main subject. In food photos leading lines can be created using utensils, table edges or even the arrangement of food itself. This technique adds depth and guides the viewer through the image.
- Play with Negative Space: Negative space refers to the empty space around the subject of your photo. Using negative space effectively can help to emphasize the main subject and create a sense of simplicity and elegance. It also allows the food photography to stand out more clearly against its background.
- Layering and Depth: Adding layers and depth to your food photos can make them more visually appealing. This can be achieved by using props such as plates, napkins and utensils to create a sense of dimension. Position some elements closer to the camera and others further away to create a three-dimensional feel.
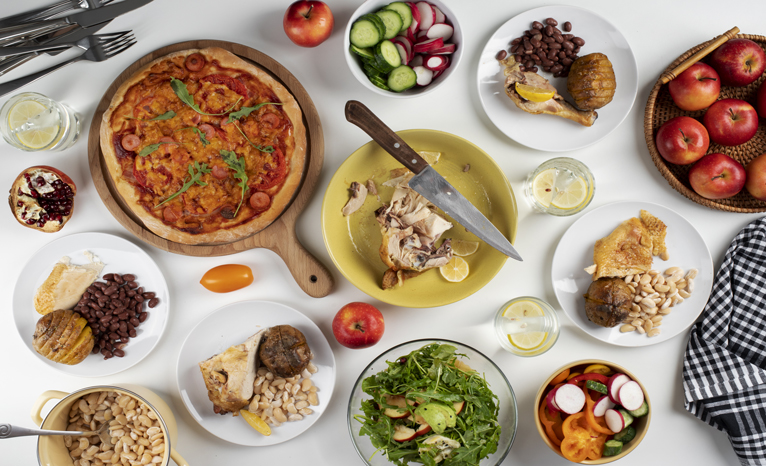
- Balance and Symmetry: While the rule of thirds is a popular composition technique, sometimes a symmetrical composition works best especially when shooting overhead shots of plated food photography. Symmetry creates a sense of balance and order making the photo pleasing to the eye.
5. Main Light for Food Blog Photography
Lighting is one of the most critical elements of food photography. The type of light you use can make or break your photos and understanding how to manipulate light is key to achieving beautiful results.
- Understanding Main Light: The main light or key light is the primary source of illumination in your photograph. It defines the form texture and shape of your subject. In food photos, natural light is often used as the main light source because it provides a soft diffused glow that enhances the food’s natural colors and textures.
- Positioning Your Light Source: The position of your main light source can drastically change the look of your photos. Side lighting is a popular choice in food photos because it creates a good balance of shadows and highlights adding depth and dimension to the image. Backlighting can also be used to create a sense of glow and make liquids, like soups or sauces, appear more translucent.
- Controlling Shadows: Shadows can add drama and depth to your photos, but too much shadow can overwhelm the image. Use a reflector or a fill light to soften harsh shadows and create a more balanced light setting for food photos.
- Diffusing the Light: If you’re shooting in harsh sunlight or with a bright artificial light source use a diffuser to soften the light. This can be anything from a professional diffuser to a sheer curtain or even a piece of parchment paper. Diffusing the light will help eliminate harsh shadows and create a more even light across your subject.
- Experiment with Artificial Light: While natural light is preferred sometimes shooting with artificial light is necessary especially in low-light situations or during the evening. Continuous LED lights or softboxes are great options for food photos as they provide consistent and controllable light.
Conclusion:
Mastering the art of food photos requires practice, patience and a willingness to experiment. By following these tips for beginners understanding the importance of natural light, choosing the right cameras and lenses, mastering composition techniques and effectively using the main light you can elevate your food photos to a professional level. Whether you’re capturing delicious food pictures for a blog, social media or a professional portfolio these techniques will help you showcase food in the most appetizing way possible.
If you’re passionate about food photography and want to take your skills to the next level, consider joining the RVR School of Photography. With expert instructors, hands-on workshops and a community of like-minded individuals RVR School offers the perfect environment to hone your craft and turn your passion for food photography into a fulfilling career. Enroll today and start your journey toward becoming a master of the hungry lens!
Clarify Your Doubts (FAQ's)
We reimburse all expenses of the Client for the payment of fines and penalties that were caused by mistakes made by us in accounting and tax accounting and reporting.
We reimburse all expenses of the Client for the payment of fines and penalties that were caused by mistakes made by us in accounting and tax accounting and reporting.
We reimburse all expenses of the Client for the payment of fines and penalties that were caused by mistakes made by us in accounting and tax accounting and reporting.
We reimburse all expenses of the Client for the payment of fines and penalties that were caused by mistakes made by us in accounting and tax accounting and reporting.
We reimburse all expenses of the Client for the payment of fines and penalties that were caused by mistakes made by us in accounting and tax accounting and reporting.
We reimburse all expenses of the Client for the payment of fines and penalties that were caused by mistakes made by us in accounting and tax accounting and reporting.
We reimburse all expenses of the Client for the payment of fines and penalties that were caused by mistakes made by us in accounting and tax accounting and reporting.
We reimburse all expenses of the Client for the payment of fines and penalties that were caused by mistakes made by us in accounting and tax accounting and reporting.

